Do you want to make your WordPress website more accessible to visitors from all over the world? By adding the Transposh translation feature to your WordPress menu bar, you can expand your international audience reach easily through the practical ways we provide to add Transposh translation to your website in this guide.
Transposh is one of the most useful free multilingual translation plugins and is widely used by WordPress users around the world. This WordPress plugin does not provide cheap features compared to other premium translation plugins but you can add this translation plugin on the Sidebar or Widget side only. If you want to add it to your WordPress menu bar then follow the steps below.
Using WP Widget in Navigation Plugin
This amazing plugin can help you place widgets into menus very easily and quickly. This is especially helpful if the functions and features are not supported by your WordPress theme. In addition, it does not only work on adding Transposh widgets to the menu bar but can also be other widgets such as; Cart or shopping cart, images, search and others.
Here are the steps to put Transposh into the menu bar:
- Install and Activate WP Widget in Navigation plugin
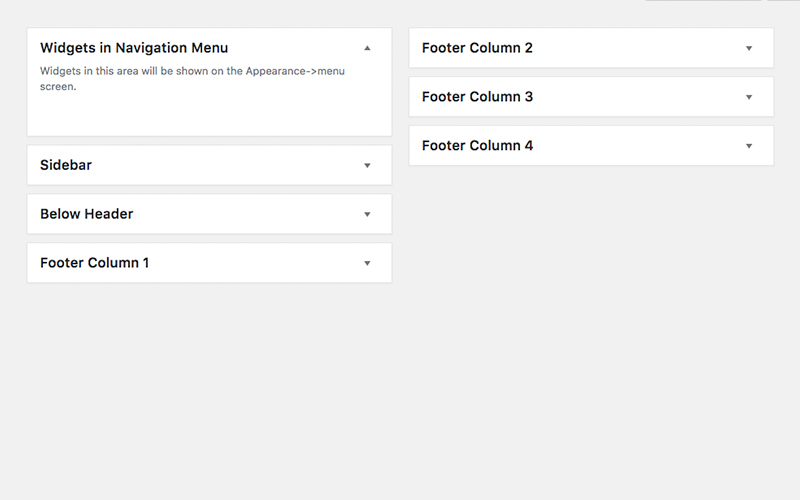
Download and install the WP Widget in Navigation plugin or directly from your WordPress Dashboard - Once successfully activated, a dedicated widget area will automatically be created for you. There, you can freely add any number of widgets you wish to the menu. This widget area will be labeled as“Widgets in Navigation Menu“.

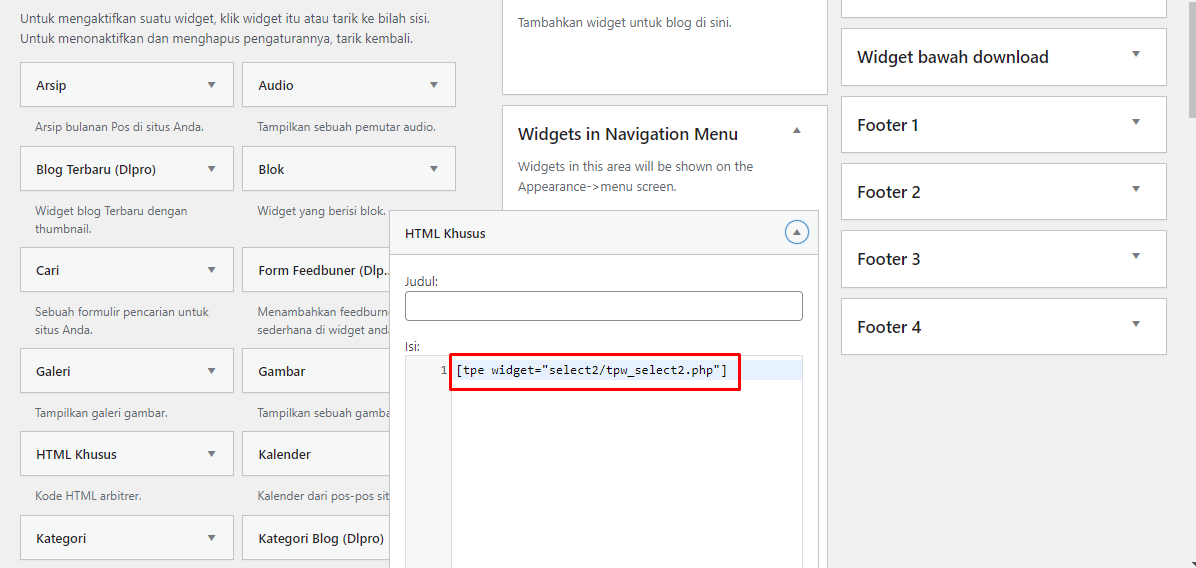
- Add a “Custom HTML” widget and fill the Transposh Shortcode into this widget area
[tpe widget="select2/tpw_select2.php"]
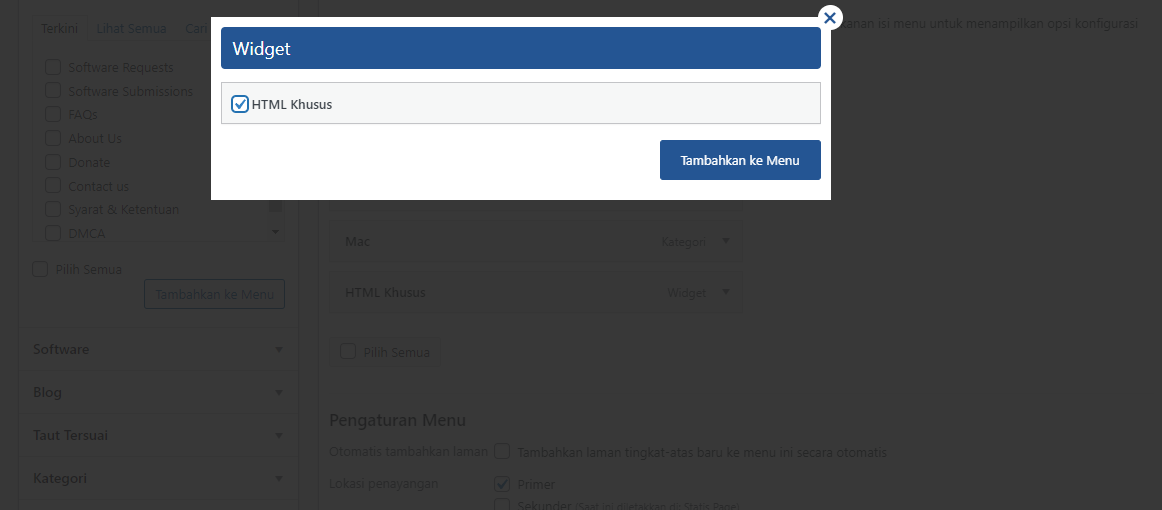
- Next, you open the menu via Appearance -> Menus. Simply hover over the menu item you want to set up, and you’ll find a“widget” button there. Click that button, and you will see a new window open then check the “Custom HTML” widget that is already set for Transposh and click Add to Menu.

- That’s it, now you can go to your web page and see the changes.
Custom CSS Transposh on the WordPress Menu Bar
For many cases after doing the steps above, there is often a problem with the layout that is still not completely neat, so it requires additional settings by means of Custom CSS to tidy up the layout in the menu bar.
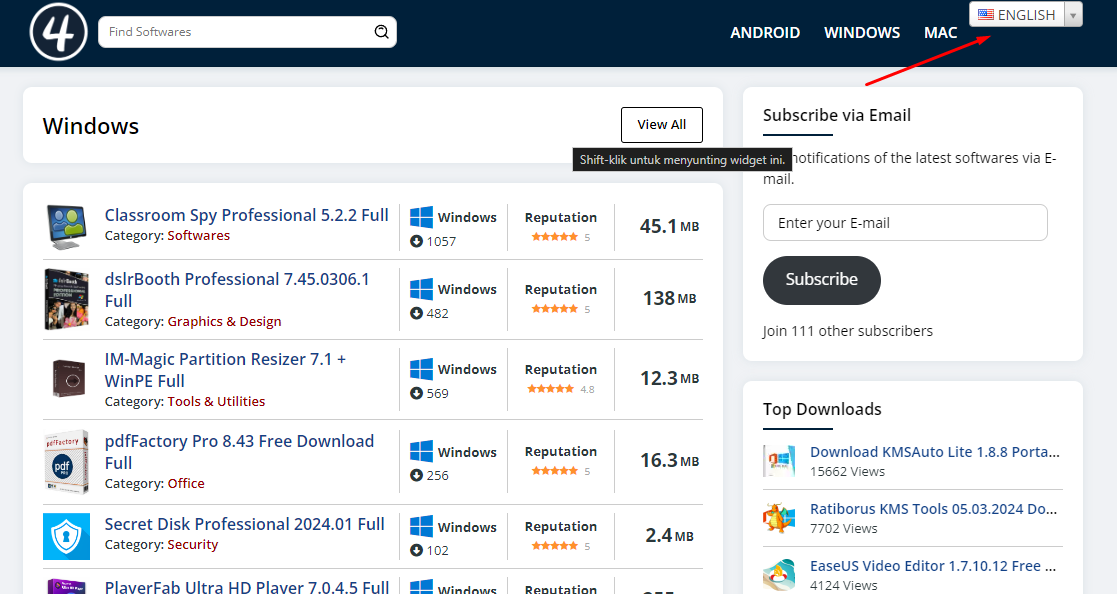
This is one example of a layout that isn’t completely tidy:

To tidy up the layout, you need to make some modifications to the CSS and here are some small pieces of CSS that can help you tidy up the layout.
.select2-container .select2-choice {
  margin-top: 18px;
	font-weight: 700;
}
.select2-search {
    display: none !important
}
.select2-container .select2-choice {
  width: 150px;
}
.select2-drop {
	font-weight: 700;
}
Explanation
- .select2-container .select2-choice This CSS code is to set the margins so that the layout looks neat and aligned in the middle with other menus
- This.select2-search CSS works for the search form, I deliberately deleted it because it only uses one language and if you use multiple languages then you can ignore the CSS.
- This.select2-container .select2-choice is to set the width of the translation box so that the translation box size does not change automatically when changing to another language.
- .select2-drop is for the CSS dropdown, here you can set the font size such as font size, font thickness and others
At this point you’ve successfully added Transposh translations to your WordPress menu bar, and if you have any other questions here, you can leave a comment so we can help you further.
Discover more from All Programs
Subscribe to get the latest posts sent to your email.


